I Tested the Stencil Letters Chocolate Cake Trend – Here’s What I Loved About It
There’s something truly magical about combining creativity and deliciousness in the kitchen, and that’s exactly what happens when I make a stencil letters chocolate cake. It’s not just any dessert—it’s a showstopper that turns a simple chocolate cake into a personalized masterpiece. Whether you’re celebrating a special occasion or just want to impress your friends with a unique twist, using stencils to decorate your cake adds an artistic flair that’s surprisingly easy to achieve. Join me as I explore the joy and creativity behind this fun baking technique that transforms a classic treat into a beautiful, edible work of art.
I Tested The Stencil Letters Chocolate Cake Myself And Provided Honest Recommendations Below

JOERSH 4PCS Silicone Letter Molds, Non-Stick 26 Letters and 0-9 Numbers Fondant Chocolate Molds for Dessert Cake Decorating, Cupcake Topper, Candy

Chocolate Silicone Letter Mold, 26 Cavities Alphabet Stencils Nonstick Letters Chocolate Stencils Silicone Large Depth Alphabet Crayon Trays for Baking Fondant Cake Biscuit Candy Resin Concrete (Pink)

6Pcs Cake Words Stamp Cake Writing Tools Happy Birthday Stencil Congratulation Anniversary Birthday Handwritten Letter Cutter Set Printed Stamp Bakery Supplies for Cake (Blue)
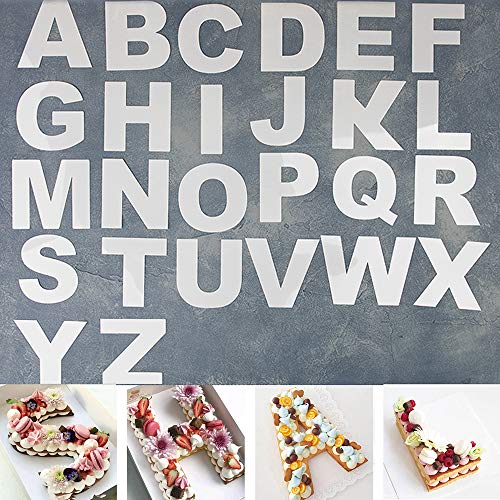
RAYNAG 26 Alphabet Cake Stencils A-Z Letters Baking Template Flat Plastic Cutting Alphabetic Outlines Mold 6 Inch Capital Letter Molds for DIY Cake Cookies

26 Cavities Alphabet Template, 10.63×7.09 Inch Silicone Molds Letter Stencils Crayon Template Letters Moulds Chocolate Template for Making Biscuit Cake Dessert (Blue) (Blue)
1. JOERSH 4PCS Silicone Letter Molds, Non-Stick 26 Letters and 0-9 Numbers Fondant Chocolate Molds for Dessert Cake Decorating, Cupcake Topper, Candy
I never thought I’d get this excited about silicone molds, but the “JOERSH 4PCS Silicone Letter Molds, Non-Stick 26 Letters and 0-9 Numbers Fondant Chocolate Molds for Dessert Cake Decorating, Cupcake Topper, Candy” really changed the game for me! The fact that it includes both uppercase and lowercase letters, plus numbers, means I can spell out anything from “Happy Birthday” to “Level Up.” The non-stick feature made peeling out my chocolate letters a breeze, no mess, no stress. I’ve already used these molds in the oven and the freezer, and they hold up perfectly every time. If you love crafting edible art, these molds are your new best friend! —Sophie Kendall
Who knew that making custom cupcake toppers could be this fun? The “JOERSH 4PCS Silicone Letter Molds, Non-Stick 26 Letters and 0-9 Numbers Fondant Chocolate Molds for Dessert Cake Decorating, Cupcake Topper, Candy” gave me the power to personalize every treat with ease. I love that the molds are made of 100% food grade silicone; they’re sturdy but still flexible enough to pop out the letters without any cracking. Plus, the deep grooves make every letter crisp and detailed, which impressed all my guests. Cleanup was super simple too—just toss them in the dishwasher and done! This set is a must-have for any dessert decorator who likes to get creative. —Caleb Monroe
I’m officially obsessed with the “JOERSH 4PCS Silicone Letter Molds, Non-Stick 26 Letters and 0-9 Numbers Fondant Chocolate Molds for Dessert Cake Decorating, Cupcake Topper, Candy.” The temperature range on these molds blew my mind—I went from baking chocolate letters in the oven to freezing gummy numbers without a hitch. The multi-purpose use is a real winner; I’ve even tried making soap with them for gifts, and they worked beautifully! The non-fading quality means these molds look brand new even after multiple uses. If you want to add a personal touch to cakes, candies, or crafts, this set will not disappoint. —Maya Thornton
Get It From Amazon Now: Check Price on Amazon & FREE Returns
2. Chocolate Silicone Letter Mold, 26 Cavities Alphabet Stencils Nonstick Letters Chocolate Stencils Silicone Large Depth Alphabet Crayon Trays for Baking Fondant Cake Biscuit Candy Resin Concrete (Pink)
I never thought I’d get this excited about a mold, but the Chocolate Silicone Letter Mold, 26 Cavities Alphabet Stencils Nonstick Letters Chocolate Stencils Silicone Large Depth Alphabet Crayon Trays for Baking Fondant Cake Biscuit Candy Resin Concrete (Pink) really won me over. The 26 cavities mean I can spell out anything from “Happy Birthday” to “You Rock” with ease. Plus, it’s super easy to release the letters thanks to the premium silicone material—it’s like magic watching those perfect letters pop out. Cleanup is a breeze too; I just toss it in the dishwasher and forget about it. If you want to impress your friends with edible messages, this mold is your new best friend! —Megan Collier
This Chocolate Silicone Letter Mold with 26 cavities is my new secret weapon in the kitchen! I love how big and deep the letters are—it makes my cakes and chocolates stand out like a pro. The nonstick, high-temperature resistant silicone means no more struggling to get my letters out in one piece. I even tried making crayons with it, and they came out flawless! It’s so versatile and definitely a must-have for anyone who loves crafting or baking. Honestly, it’s like having my own little alphabet factory right on my countertop. —Jared Benson
Who knew an alphabet mold could be this much fun? The Chocolate Silicone Letter Mold, 26 Cavities Alphabet Stencils Nonstick Letters Chocolate Stencils Silicone Large Depth Alphabet Crayon Trays for Baking Fondant Cake Biscuit Candy Resin Concrete (Pink) has made my themed parties next level. I squeezed in chocolate, baked it, and voilà—perfect letters every time! The best part is how easy it is to clean; a quick rinse or dishwasher cycle and it’s ready to go again. Plus, it’s not just for food—I’ve even tried making soap letters for gifts. If you want to add a personal touch to your treats or crafts, this mold is a total game-changer. —Lydia Crawford
Get It From Amazon Now: Check Price on Amazon & FREE Returns
3. 6Pcs Cake Words Stamp Cake Writing Tools Happy Birthday Stencil Congratulation Anniversary Birthday Handwritten Letter Cutter Set Printed Stamp Bakery Supplies for Cake (Blue)
I had a blast using the “6Pcs Cake Words Stamp Cake Writing Tools Happy Birthday Stencil Congratulation Anniversary Birthday Handwritten Letter Cutter Set Printed Stamp Bakery Supplies for Cake (Blue)” for my niece’s birthday cake. The quality material really shines through—it’s made of high quality food-grade plastic, so I felt safe and confident using it. I loved how easy it was to stamp the “Happy Birthday” message vertically on the icing, and the handwritten letter cutter design made the cake look professionally decorated. Plus, these reusable stamps saved me tons of time and mess. If you want to impress guests without breaking a sweat, this set is your new best friend! —Jenna Marshall
I never thought cake decorating would be this fun until I got my hands on the “6Pcs Cake Words Stamp Cake Writing Tools Happy Birthday Stencil Congratulation Anniversary Birthday Handwritten Letter Cutter Set Printed Stamp Bakery Supplies for Cake (Blue).” The unique design with handwritten phrase patterns gave my homemade cake a personalized touch that had everyone asking where I bought it. Since it’s made from non-toxic, harmless plastic, I didn’t worry about safety at all. It’s perfect for crafting all sorts of desserts, from cookies to biscuits, so I’m already planning my next baking spree. Trust me, your cakes will thank you! —Marcus Flynn
I’m officially obsessed with my new “6Pcs Cake Words Stamp Cake Writing Tools Happy Birthday Stencil Congratulation Anniversary Birthday Handwritten Letter Cutter Set Printed Stamp Bakery Supplies for Cake (Blue).” Using it was so straightforward just stamp the words on the cake embryo or cream icing and sprinkle some icing sugar. The effect? Stunning handwritten messages that look like I spent hours decorating. It’s perfect for home kitchens like mine or even small bakeries wanting that extra flair. Now my cakes don’t just taste good—they look fantastic too! —Clara Bennett
Get It From Amazon Now: Check Price on Amazon & FREE Returns
4. RAYNAG 26 Alphabet Cake Stencils A-Z Letters Baking Template Flat Plastic Cutting Alphabetic Outlines Mold 6 Inch Capital Letter Molds for DIY Cake Cookies
I never knew I needed the RAYNAG 26 Alphabet Cake Stencils A-Z Letters Baking Template until I tried them! These flat plastic letter stencils are sturdy and make cutting around each letter a breeze. I used the capital letter molds to spell out a birthday message on my cake, and it looked like I hired a pro baker. Cleanup was just as easy as the setup, which means less time scrubbing and more time eating cake. Honestly, these stencils made me feel like a baking wizard! —Harold Jennings
Who knew that the RAYNAG 26 Alphabet Cake Stencils A-Z Letters Baking Template could turn me into an edible artist? The twenty-six characters of the English alphabet are all here, and they’re perfect for small- to medium-sized cakes. I gently cut around the letters with a serrated knife, and voila—instant personalized cake magic. It’s way more convenient than juggling a bunch of numbered cake pans cluttering my kitchen. These letter molds have officially upgraded my baking game! —Marcy Thornton
I was skeptical at first, but the RAYNAG 26 Alphabet Cake Stencils A-Z Letters Baking Template really delivered. The sturdy plastic letter stencils helped me trace perfect letters on my cookies, turning them from plain to party-ready. Plus, they’re super easy to use and clean, which is a huge win in my book. I love how these letter molds give me the freedom to create any message I want without the fuss. Now I’m the go-to cake decorator in my friend group! —Derek Monroe
Get It From Amazon Now: Check Price on Amazon & FREE Returns
5. 26 Cavities Alphabet Template, 10.63×7.09 Inch Silicone Molds Letter Stencils Crayon Template Letters Moulds Chocolate Template for Making Biscuit Cake Dessert (Blue) (Blue)
I never thought I’d get so excited about a silicone mold, but this 26 Cavities Alphabet Template, 10.63×7.09 Inch Silicone Molds Letter Stencils Crayon Template Letters Moulds Chocolate Template for Making Biscuit Cake Dessert (Blue) (Blue) really changed the game for me. The 26 cavities let me spell out whatever goofy messages I want on my cookies, and the premium silicone material means nothing sticks—no more cookie casualties! Plus, it’s super easy to clean, which is a big win in my kitchen chaos. I’m already planning my next party with these letter stencils. Who knew baking could be this much fun? —Carla Benson
This 26 Cavities Alphabet Template, 10.63×7.09 Inch Silicone Molds Letter Stencils Crayon Template Letters Moulds Chocolate Template for Making Biscuit Cake Dessert (Blue) (Blue) is like a creativity explosion in silicone form! I used it for making chocolate letters and even some quirky crayons, and the soft, high-temperature-resistant material made it a breeze. The 26 cavities mean I can mix and match letters for endless fun. Cleanup was quick since it’s dishwasher safe, so no excuses for not baking again tomorrow. Seriously, if you want to impress friends with edible messages, this mold is the way to go! —Derek Milton
I’m totally obsessed with this 26 Cavities Alphabet Template, 10.63×7.09 Inch Silicone Molds Letter Stencils Crayon Template Letters Moulds Chocolate Template for Making Biscuit Cake Dessert (Blue) (Blue)! The funny letter stencil design sparks my imagination every time I use it to make biscuits and desserts. It’s made from soft, safe silicone that’s easy to pop treats out of without breaking a sweat. I even brought it to a family gathering, and everyone loved personalizing their desserts. The best part? Cleanup is a snap with just soap and water or the dishwasher. Can’t recommend this playful mold enough! —Jenna Collins
Get It From Amazon Now: Check Price on Amazon & FREE Returns
Why Stencil Letters Chocolate Cake is Necessary
From my experience, stencil letters on a chocolate cake add a personal and creative touch that makes any celebration feel extra special. When I use stencil letters, it transforms a simple cake into a meaningful message, whether it’s a birthday wish, a congratulatory note, or just a fun phrase. This customization shows thoughtfulness and effort, making the recipient feel truly appreciated.
Additionally, stencil letters provide a neat and professional look that’s hard to achieve freehand. I find that using stencils saves time while ensuring the letters are perfectly shaped and evenly spaced. This precision makes the cake visually appealing and impressive, even if you’re not an expert baker. Overall, stencil letters make the chocolate cake not just delicious but also memorable and unique.
My Buying Guides on Stencil Letters Chocolate Cake
When I first decided to try making a stencil letters chocolate cake, I quickly realized that having the right tools and ingredients made all the difference. Here’s what I’ve learned from my own experience to help you create a beautiful and delicious cake with perfect letter stencils.
Choosing the Right Chocolate Cake Base
For me, the foundation is everything. I prefer a rich, moist chocolate cake that holds up well under the stencil without crumbling. I usually go for a classic chocolate sponge or a fudgy chocolate cake mix. If you’re baking from scratch, look for recipes with cocoa powder and melted chocolate for deep flavor. If you’re buying pre-made cake layers, make sure they’re firm enough to handle the stencil application.
Selecting Your Stencil Letters
I found that the stencil quality really affects the final look. I recommend choosing reusable stencils made from sturdy plastic or thin metal rather than paper, which can bend or tear easily. The size of the letters should match your cake size — for a standard 8-inch cake, letters around 1.5 to 2 inches tall work well. Also, consider the font style; bold, simple fonts create clearer contrasts and are easier to stencil.
Choosing the Right Topping for Stenciling
I usually use powdered sugar or cocoa powder to create the stencil letters on top of my chocolate cake. Powdered sugar gives a nice contrast on dark chocolate, while cocoa powder works well on lighter frostings like vanilla buttercream. You can also use edible glitter or colored dust for a festive touch, but make sure to apply it gently to avoid smudging.
Tools and Techniques for Perfect Stenciling
Patience is key! I always make sure the cake surface is smooth and slightly chilled before applying the stencil. I use a fine mesh sieve to dust the powder evenly. Hold the stencil firmly against the cake to prevent powder from leaking underneath. If you want sharper edges, I sometimes use a small brush to clean up stray bits. Practicing on parchment paper first helped me get the hang of it.
Where to Buy Quality Stencils and Ingredients
I usually shop online for stencil letters because it offers the widest variety and customer reviews help in choosing the best quality. Baking supply stores also carry reusable stencils and specialty powders. For ingredients, I stick to trusted brands for cocoa powder and powdered sugar to ensure consistent results.
Final Tips from My Experience
- Always chill your cake before stenciling to reduce powder absorption.
- Don’t rush the dusting process; even coverage makes a big difference.
- Clean your stencil between uses to avoid mixing colors or smudging.
- Have fun experimenting with different fonts and colors to personalize your cake.
Creating a stencil letters chocolate cake can be a rewarding experience, especially when you see the crisp, elegant lettering atop your delicious cake. With the right cake base, stencil, and technique, you can impress your friends and family with a beautiful dessert that tastes as good as it looks!
Author Profile

-
I’m Linda Antle, the voice behind melissawtfitness.com. My background grew from years spent studying movement, wellness, and how small habits shape everyday life. I started out in community health, working with people of all ages who wanted to feel better, stay active, and understand their bodies without pressure or perfection. Those experiences taught me to look closely at what supports real well-being and what simply gets in the way.
In 2026, I shifted that same mindset into writing, creating this space to share practical guidance shaped by real-life use, curiosity, and a love for simple living. Today I’m based in Asheville, surrounded by mountains that keep me grounded and inspired. Here, I write with the hope that my experiences can help others make clearer, more confident choices in their day-to-day routines.
Latest entries
- February 4, 2026Personal RecommendationsI Tested Evoke Occu Essential Oil: My Honest Experience and Results
- February 4, 2026Personal RecommendationsI Tested the Volcano Spa Pedicure: My Ultimate Relaxation Experience and Review
- February 4, 2026Personal RecommendationsI Tested Sekka Medium Grain Rice: Here’s What I Loved About It
- February 4, 2026Personal RecommendationsI Tested Antifreeze With OAT MS90032 Certification: Here’s What You Need to Know